Table of Contents
How to Build a Hash Lab at Home
“Hash Lab” can mean different things to different people. Your hash lab will be defined by your goals. What all hash labs have in common is HASH. No matter if you are washing 50 pounds or half a pound, hash is made in the hash lab.
There are different levels to an at-home hash labs ranging from a small table space with bubble bags, a bucket, and a rosin press all the way to temperature controlled rooms fitted with massive wash machines, water storage/filtration, freeze dryers, and more. How deep you get into it will depend on your goals and your budget.
In this article we will discuss how to be honest about your hash goals and what those means for building your very own hash lab at home. From there, we will discuss how to build a hash lab at home, the material necessary, and the estimated cost of the project.
Bubble Hash and Rosin Basics
Before we get into how to make a hash lab at home, let’s discuss the basics of how to make bubble hash and hash rosin.
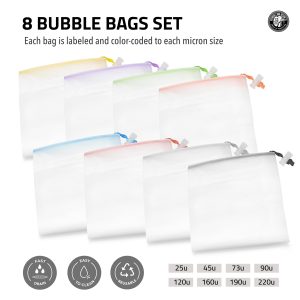
Bubble hash is made by mixing ice, cold water, and fresh flower in a bucket to knock the trichomes off the plant. Trichomes are then collected and filtered through bubble bags to leave you with hash.
People love hash because it is completely solventless – it only takes ice and water to make it (no butane). Aside from that, it is actually pretty darn simple to do. Anyone with some bubble bags, a bucket, and ice cold water can make bubble hash.
Simply line a CLEAN bucket with your 220 micron bubble bag. Fill the bucket with ice cold water or ice and water. Then add your flower. Let that soak for 10-20 minutes to fully hydrate the flower and let it come to temperature. Now, take a stainless steel mixing paddle and start agitating that mixture to knock the trichomes loose! Avoid mixing too hard or you risk tearing the bubble bag. Let this sit for 5-10 minutes so the trichomes can settle.
While you wait, line a 2nd clean bucket with the remaining bubble bags in ascending order (25 micron up to 190 micron on top).
Grab the 220 micron bag and lift it up so the water drains back into your bucket. If you have something to hang the bag on – all the better. If not, enjoy the arm workout.
Once the bag has fully drained, take that bucket of water and dump it into your 2nd bucket which should already be lined with your remaining bubble bags in ascending order. Remove the bags one at a time and let the water drain back into the bucket. Whatever is left on the bubble bag is your hash! It can be collected with a cold spoon (Pro Tip: Keep a 2nd spoon in the fridge so you can always have a cold spoon through the process).
The highest and lowest microns will have your lesser quality hash which is best used for edibles. But right in the middle – 73 micron to 120 micron – that is the hash sweet spot. Make sure to collect every last bit of hash from those bubble bags!
Lay the hash on some parchment paper and let it dry (air dry in a cardboard box or freeze dry if you’re fancy like that). It will take about 12-48 hours until your hash is fully ready. Congratulations, you just washed bubble hash.
All you need to press hash rosin is hash, 15-37 micron rosin press bags, parchment paper, and a rosin heat press. Choose a rosin bag size that works well with the size of the plates on your rosin press. You do not want the rosin bag size to exceed the plate size. In fact, it is best to give yourself about ½ inch margin along all sides (example: 3×6 inch plates work with rosin bags up to 2.5×5.5 inches).
Simply fill your rosin bag with hash, being careful to not overfill or leave any air pockets. Leave about ½ inch at the top so you can fold the rosin bag closed (note: it will not seal closed, but it will stay closed once it is pressed between the rosin press plates).
Line your rosin press plates with parchment paper. You can usually use magnets to keep the parchment paper in place. Place the filled rosin bag in the middle of your press plates and clamp it just enough to hold it in place.
Heat the rosin press plates up to about 180-190℉ then begin the slowly and steadily increase the pressure. The goal is to squeeze the warmed rosin bag without bursting it or burning the trichomes inside.
After a minute or two (depending how much you are pressing), your hash rosin should be on the parchment paper and ready to collect. It can be smoked immediately or you can choose to cure it to change the color, consistency, and even the flavor.
There are small things you can do (like directional flow parchment, double bagging, etc.) to increase efficiency and even yield, but what was just outlined is the basic premise.
Best Location for a Hash Lab at Home
There are a few considerations you should be taking into account when choosing the best location for your hash lab at home. While size does not, it is not the most important factor. In fact, it is not uncommon to see hash labs set up with less than 100 square feet of space (the size of a large-ish closet).
The most important factor to consider when setting up your hash lab is temperature. Basements or another well-air conditioned room will allow you to more easily lower the temperature to hash washing specs. To get your room to a low enough temperature ideal for washing hash, you will have to utilize an AC unit with a system to hack the temperature sensor.
CoolBot is a highly popular system right now. It basically tricks your AC unit into cooling below the factory settings. Most AC units do not go lower than about 60℉, but we are aiming for around 40-55℉.
Of course you will need a power supply for the AC unit, the temperature system, and any other equipment you have (rosin press, freeze dryer, washing machine, etc.) So, a reliable wall outlet or two is absolutely key.
You should also consider where you will be draining all of your waste water after the wash is complete and the hash is collected. It can be a real pain to carry a big bucket of water out of the room to dispose of. Basements with drains already in place, or a mudroom with a big sink can be quite useful.
Finally, this should go without saying, but don’t wash hash in a dirty room. Cleanliness is paramount to making top quality hash. While rugs can be comfy, they also trap a lot of dust and particles that can find their way into your hash. You can install some inexpensive floor covers (think plastic sheets) if needed.
What Kind of Hash Lab Do You Want?

Defining Your Goals
Be honest with yourself, are you looking to dump thousands of dollars into an advanced lab set up, or are you interested in making a clean environment where you can take your hash hobby to the next level? We have laid out 3 levels of home hash labs: Hobby Lab, Climate-Controlled Lab, and the Advanced Lab.
The Hobby Lab can cost as little as $100 to set up. You’ll be washing hash quickly and without breaking the bank. This is ideal for the hash enthusiast who just wants to wash a smaller amount of hash from time to time.
The Climate-Controlled Lab is where things start to get serious. This kind of set up can cost you anywhere from about $3000 to $7000. But any serious hash maker will tell you that a cold room is how you really elevate your hash game. Just think of the terpene preservation! Heck, you can probably even increase yield with a cold room for hash.
The Advanced Lab is mostly reserved for small craft operations. This kind of set up can run you $15-60k depending on how much equipment you get.
How to Build a Hash Lab at Home: Hobby Lab
Materials & Cost
- Bubble Bag set (5-10 gallon)
- $30-$150
- 2 Buckets with corresponding size to bubble bags
- $10
- Clean water and ice
- $10
- Stainless steel mixing paddle
- $30
- 2 cold spoons for collection
- Free, just use kitchen spoons
- Parchment paper and a cardboard box for drying
- $5
- Folding table for workspace
- $50
Total cost: $100 – $300
Step-By-Step Hobby Lab
This one is pretty simple to get set up. First off, decide where you want to set up your supplies. It should ideally be in the coldest part of your house (hash likes it cold). Near an AC unit would be ideal.
Place your buckets on the ground, bubble bags lining the buckets (see the above section How to Make Bubble Hash), your parchment-lined cardboard box on the table, collection spoons in a (hopefully nearby) freezer, and ice in the 220 micron bucket. Now you are ready to start washing hash!
How to Build a Hash Lab at Home: Climate-Controlled Lab
Materials & Cost
- Window AC Unit or minisplit
- $300 – $2,000
- CoolBot system
- $400
- 32-55 gallon bubble bag set
- $250
- 2 large buckets (32 – 55 gallons)
- $200
- Reverse osmosis water filter (optional)
- $500
- Upgraded rosin press (optional)
- $3000
- Insulation wall panels (optional)
- $150
Total cost: $4,800 – $6,500
Step-By-Step Climate-Controlled Lab
1. Insulate the room (optional)
Use insulated wall panels to line the room. This will help to keep the room cold. Follow manufacture instructions or any how-to guide online. It can be pretty bare bones, but you can get sophisticated if you want. You will probably need screws, wall anchors, and silicone sealant for the cracks.
2. Install AC Unit and CoolBot
This is the most important step you have to follow for a proper climate-controlled hash lab. First off, set up your AC window unit or mini split by mounting it in place. Next, follow manufacture instructions to remove the front panel and find the temperature sensor. It is usually a single wire with a sensor on the end that may be clipped to the fins of the AC unit.
Now, you can mount your CoolBot to the wall next to the sensor and the wall outlet. Take the CoolBot’s red-tip and black cable heat sensor and lay it along the AC Unit’s temperature sensor. Use the provided aluminium foil or any kitchen aluminium foil to wrap them together. This is how you will trick the AC Unit to cool lower than factory settings. The heat sensor wire should plug into the Heat Port of the CoolBot.
We will now replace the AC Unit temperature sensor with the temperature sensor from the CoolBot. Plug the CoolBot temperature sensor into the Fins Port of the CoolBot and then slide the sensor end into the fins of the AC Unit towards the bottom. You can use a pencil to lightly spread the fins so the sensor can easily insert. Press the fins back together to hold the sensor in place.
To tell what the actual room temperature is, use the blue-tip black cable 2nd temperature sensor from the CoolBot. Plug this into the Room Port of the CoolBot. Let this sensor hang below the device.
To power the device, plug the CoolBot power cable into the power port and then into the wall outlet.
Remove the filter from the front of the AC Unit, then follow manufacture instructions to replace the front panel onto the AC Unit.
To set the CoolBot temperature, press the checkmark button in the center of the device. Then use the left or right buttons to set the desired temperature (40-55℉). Press the checkmark button again to confirm your choice.
Finally, turn your AC unit on and set it to the lowest temperature on cool mode with the fan set to high. Now you are fully ready to make a nice and cold hash lab!
3. Set up the rest
Follow the instructions in the above section, Hobby Lab, to finish setting up your rosin press station and positioning your buckets for washing.
How to Build a Hash Lab at Home: Advanced Lab
Materials & Cost
- Climate-controlled room set up (see above)
- $3,000-$7,000
- Freeze Dryer
- $2,000
- Automatic Wash Machine
- $6,000 – $40,000
- Water tank and chiller
- $5,000
Total cost: $16,000 – $60,000
Step-By-Step Advanced Lab
Follow the instructions above to set up a Climate-Controlled Hash Lab. Now you can add into your advanced equipment such as automatic wash machines, freeze dryers, water storage systems and more. Follow the manufacturer’s instructions to properly set up your equipment.
Legality of Making a Hash Lab at Home
Cannabis unfortunately remains federally illegal which means you should check your state’s laws regarding cannabis use and production. Even within states where marijuana is legal recreationally and/or medically, there are still restrictions on home-grows. Some states do not allow cannabis users to grow their own. If you are in a non-home grow state, then you probably won’t have legal access to enough cannabis to make a hash lab worth it.
If you are in a home-grow state, check your local regulations for how much cannabis you are allowed to grow and handle. Finally, always produce hash and rosin for personal use unless you have a production and/or distribution license. Selling hash, even if it is homemade, can lead to serious legal consequences.