Washing Hash 101:
Everything You Should and Need to Know About How to Wash Bubble Hash
About the Art of Washing Hash
The Basics
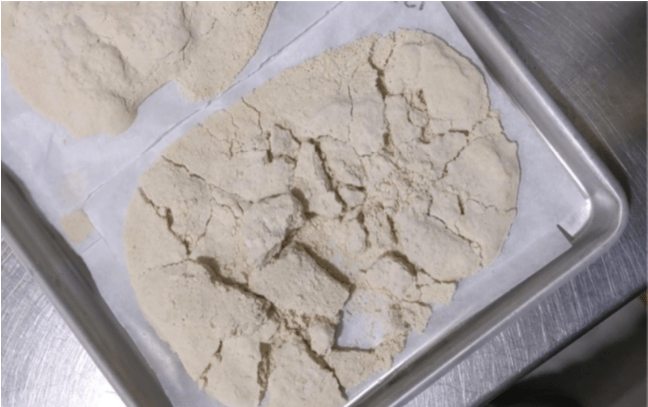
Hash is one of the most desired cannabis products available. Full-melt hash can be dabbed as is or pressed into premium grade hash rosin. Hash is so attractive because of its solventless production and because it contains the full-spectrum of cannabinoids and terpenes that were present on the cannabis. The basic principle is to use very cold water and ice to separate trichomes from the cannabis plant. Trichomes contain cannabinoids and terpenes, both of which are not water soluble.
The trichomes are collected in a series of micron filter bags. Different microns produce different quality hash, but we will get to that in a bit. After drying the remaining water, you are left with hash! Specifically, bubble hash which can also be classified as ice water hash, water hash, or melt (full or half). The term “bubble” comes from the appearance of the hash when you dab it (it bubbles). “Full-melt” describes the hash being able to fully melt when dabbed, i.e. there is no leftover, unwanted plant matter in the hash.
All About the Trichomes
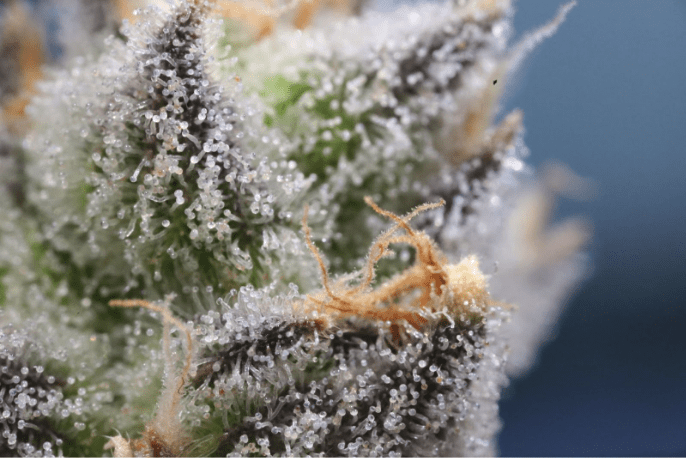
So if plant material (like chlorophyll and other molecules) is unwanted, then what do we want? We want those sweet, sweet trichomes (trichs) and we want a lot of them! Trichomes are the part of the cannabis plant which contain cannabinoids and terpenes. The goal of washing hash is to separate these trichomes from the plant.
Trichomes are at most 500 microns in diameter/height so the use of very fine nylon mesh Wash Bags is necessary to collect them (a micron is one-millionth of a meter). But not all trichomes are as desirable as the rest! There are 3 types of trichomes on the cannabis plant. Let’s take a quick look at each of them.
Bulbous Trichomes
Bulbous trichomes are the smallest trichome on the cannabis plant. They are only about 25 microns and are found all over the plant. You will not be able to see these trichomes without a microscope.
Capitate-Sessile Trichomes
Capitate-sessile trichomes are much more common than their bulbous counterparts. While they are slightly bigger (about 50 microns), you still need a microscope to find them. Usually, these trichomes can be found on the underside of the cannabis leaves.
Capitate-Stalked Trichomes
Capitate-stalked trichomes are the largest and most abundant trichomes found in the cannabis plant. These, you can see with the naked eye. They cover the actual flower of the cannabis plant and give it a frosty and shiny look. The term “stalked” refers to the actual stalk these trichomes have below the bulb which contains all the cannabinoids and terpenes. This stalk can be broken and that is why capitate-stalked trichomes are the best for making premium hash.
Star Rating System
The quality of hash is generally rated as being between 1 and 6 star hash. The best hash has no plant matter contaminating it at all. When dabbed, 6 star hash will fully melt (hence the name: full melt). Because full melt has relatively lower yields than other quality hash, it comes with a high price tag. Lower quality hash (1-2 star) is considered “food grade” because it may be best used in the production of edibles. Mid range hash (often referred to as “half melt”) is generally pressed into hash rosin.
The rating system is entirely subjective; meaning that one person’s 6-star may be 4 or 5 star to another. Some feel the rating system is too narrow to describe the minute differences between one hash and another. A good test is to dab the hash, if there are little black dots left over on your banger, chances are it is not 6 star. Now let’s get into how to wash bubble hash…
Table of Contents
How to Wash Bubble Hash
Necessary Materials
There are a few essential tools you will need for a successful hash wash. A quality wash starts with the cannabis flower you use. You can use properly dried and cured cannabis to wash hash, but some prefer to use fresh frozen material. This means that the whole plant (without trimming) was immediately frozen after cropping. This can help to retain some valuable terpenes you may have lost otherwise.
It should be no surprise that washing hash requires Wash Bags. These bags have a nylon mesh screen at the bottom that will catch some of the cannabinoids and terpenes while letting others pass through (depending on their size). Some bags are made entirely of nylon mesh while others are mostly cloth with a nylon mesh bottom. Full nylon bags will drain quicker during the wash process. Mesh bottom bags may be a bit sturdier. Which you use is up to your personal preferences.
The nylon mesh screens are very fine. They are measured in microns (one-millionth of a meter) and each micron Wash Bag will “catch” different quality hash. Generally there are 8 micron sizes in a Wash Bag set – 220µ, 190µ, 160µ, 120µ, 90µ, 73µ, 54µ, and 25µ. The best hash will come from 120µ to 45µ. The largest microns, 220µ and 190µ, usually only contain plant material and can be thrown away.
The 160µ bags can “catch” quality hash from certain washes but it is possible the bag may contain hash that you might not want to dab or rosin, but can be useful for pre rolls or edibles. Finally, the 25µ bags are generally considered “food grade” and can be trashed.
There are different size Wash Bags that you can choose from to fit your needs. The most common bag sizes are 1 gallon, 5 gallon, 20 gallon, and 32 gallon. The smallest bag, 1 gallon, can fit up to around 2 ounces of cannabis flower. The 5 gallon bag can fit up to a half pound of flower. Twenty (20) gallon bags can fit up to about 2 pounds and the 32 gallon bags up to around 3 pounds of cannabis flower.
In addition to starting material (cannabis flower) and a Wash Bag set, you will also need (at least) two buckets to match your Wash Bag size (i.e. 5 gallon Wash Bags need 5 gallon buckets), a water sprayer, a mixing utensil (avoid wood), a spoon, ice, water (distilled or reverse osmosis), a can or bowl, and a towel. It should also be noted that washing hash is most successful when done in a cold environment, like a walk-in freezer. The cold air keeps the ice and water cold which keeps your cannabis cold which allows the trichomes cold and allows them to break away cleanly from the plant to be collected as hash.
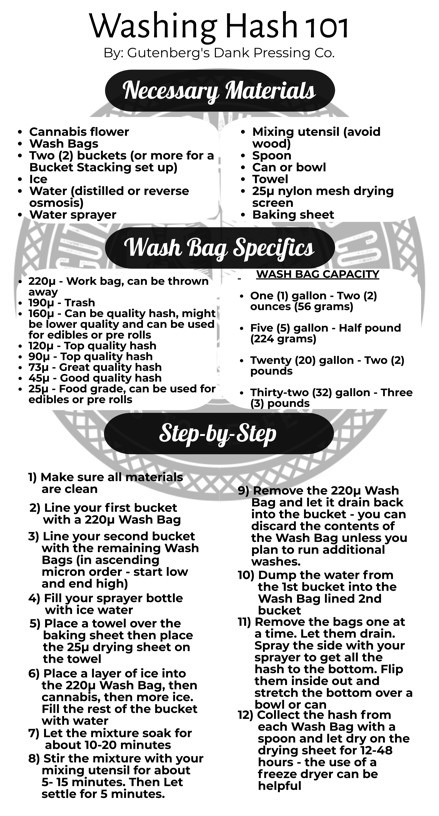
How to Wash Bubble Hash: Materials
- Cannabis flower
- Wash Bags
- Two (2) buckets (or more for a Bucket Stacking set up; see the “Bucket Stacking Set Up” section)
- Ice
- Water (distilled or reverse osmosis)
- Water sprayer
- Mixing utensil (avoid wood)
- Spoon
- Can or bowl
- Towel
- 25µ nylon mesh drying screen
- Baking sheet
Wash Bag Hash Quality
- 220µ – Work bag, can be thrown away
- 190µ – Trash
- 160µ – Can be quality hash, might be lower quality and can be used for edibles or pre rolls
- 120µ – Top quality hash
- 90µ – Top quality hash
- 73µ – Great quality hash
- 45µ – Good quality hash
- 25µ – Food grade, can be used for edibles or pre rolls
Wash Bag Capacity
- One (1) gallon – Two (2) ounces (56 grams)
- Five (5) gallon – Half pound (224 grams)
- Twenty (20) gallon – Two (2) pounds
- Thirty-two (32) gallon – Three (3) pounds
Set Up and Pre Soak
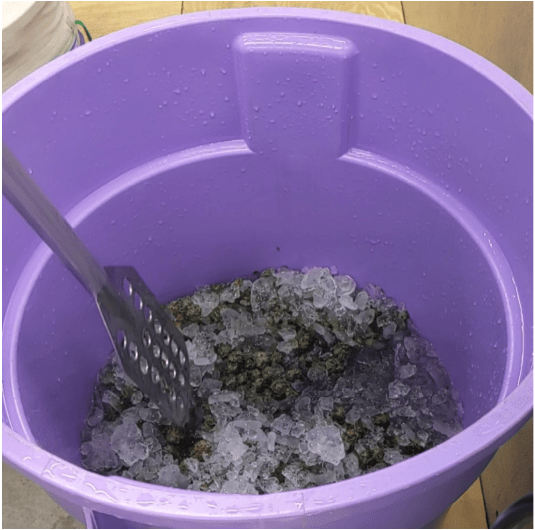
To begin, first make sure all your materials are clean. No one wants dirty, contaminated hash. Next up is the pre-soak. This will prepare the trichomes to easily separate from the cannabis when you wash it. You can do the pre-soak either with the 220µ bag in place or with no bag at all. If you want to use a bag, take one of your buckets and line it with the 220µ Wash Bag.
Now it is time for the main ingredient – cannabis. Place a layer of ice on the bottom of the bag (or bucket), then a layer of cannabis flower, then some more ice. Finally, fill the bucket up about ¾ of the way with a combination of ice and your distilled or reverse osmosis water. Let this mixture sit and soak for about 10-30 minutes.
While you let that soak, there are a few other things you can do to set up for the rest of the wash. Line the second bucket with the remaining Wash Bags in ascending micron order. For example, begin with the 25µ bag, then 45, 73µ, 90µ, 120µ, 160µ, and 190µ. If you did not use the 220µ bag during the pre-soak, it should be the top bag here.
How many of these bags you use is entirely up to you. Wash with 7 bags, 5 bags, 2 bags, whatever works best for your needs. As we mentioned in the “Necessary Materials” section above, different micron bags will “catch” different quality hash. This is important to take into account.
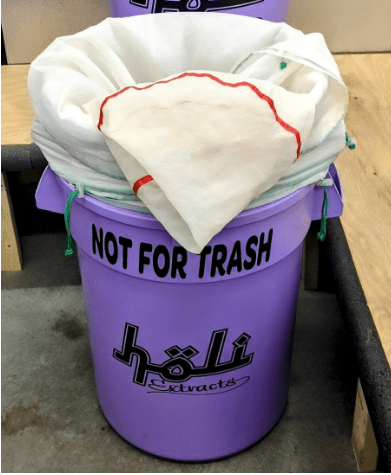
The last two things you need to set up are your drying rack and sprayer bottle. Cover the baking sheet with a towel and place the 25µ nylon mesh drying screen on the towel. Fill the sprayer bottle with ice water. These will come in handy later.
Bucket Stacking Set Up
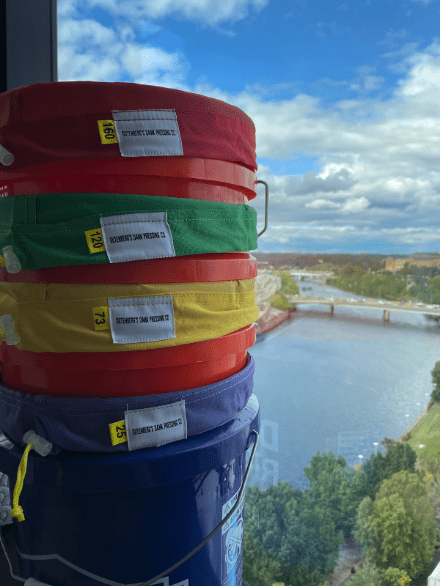
Instead of stacking all the Wash Bags over a single bucket, some prefer to use multiple half buckets (buckets cut in half so there is an opening on both the top and bottom) to give the Wash Bags a bit of separation in between. Without this separation, with a traditional set up, the bottoms of the Wash Bags will lay on each other and some feel this increases chances for contamination between micron layers.
To create a Bucket Stacking system, you will need your Wash Bags, as many buckets as the number of Wash Bags you are using, pliers, a box cutter, a ruler, a marker, and sandpaper. Line your first bucket with your lowest micron bag (usually 25µ). Next, measure about 6-8 inches from the top of each of the remaining buckets and make a mark all the way around. Now, take your box cutter and cut each of the buckets along the 6-8 inch mark you just made. You can use the pliers to remove the handle of each bucket if you feel it is necessary.
Finally, place the first bucket top into the bucket already lined with the 25µ Wash Bag so it fits snug. Now place your next highest micron bag over this bucket top. Repeat this process for all the Wash Bags you are using. Make sure to place the bags in ascending micron order (i.e. 25µ, 45µ, 73µ, 90µ, 120µ, 160µ, 190µ).
Washing
After the pre-soak, it is time to wash some hash! Use your mixing utensil to GENTLY stir the mixture. We do not want to mash or beat it as this can add unwanted plant matter to the hash. Keep stirring for about 5-15 minutes. The longer you stir, the more material you may release from the plant, but it may be less clean.
For rosin production, you may want a longer wash to achieve higher yields. The plant material will be pressed out anyway. To produce full-melt hash, keep the wash time down to about 5 minutes. Yield will be lower, but the quality will be superb. Next, let the mixture sit for about 5 minutes so the hash can settle.
Now, you can remove the 220µ Wash Bag and let the water drain back into the bucket. The 220µ bag will contain whatever ice (if any) is left over and plant material. Unless you plan to run additional washes (see the section “Additional Washes” below), the contents of the 220µ bag can be discarded (compost it!). Take the bucket containing the wash water and carefully dump it into your other bucket (or bucket stack). The water will filter through the remaining Wash Bags.
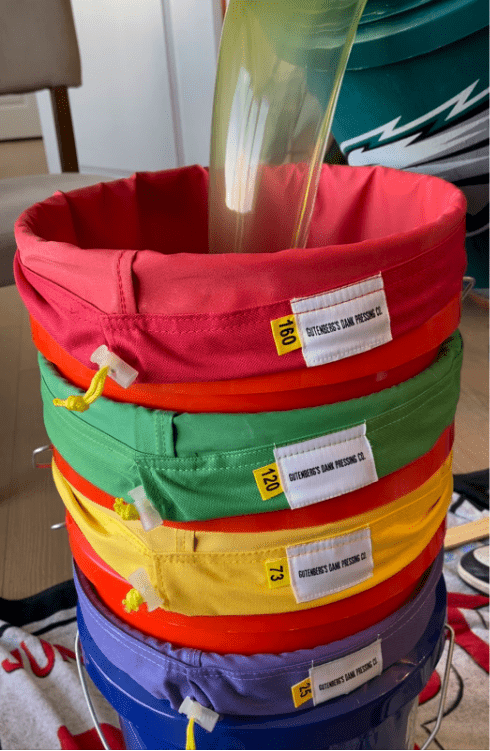
Wash Bag lined bucket for filtration – Jelly Bros
Collection and Drying
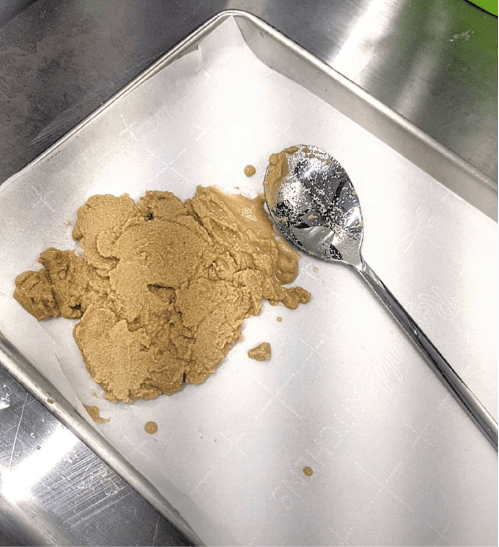
After letting the mixture settle for a few minutes, use your sprayer filled with ice water to spray the sides of the top Wash Bag. You want to get ALL of the material off of the sides and onto the nylon mesh bottom of the bag. Now you can pull the top Wash Bag out and allow the water to drain back into the bucket. It can be helpful to gently shake the bag.
When fully drained, flip the Wash Bag inside out and stretch the nylon mesh bottom over a bowl or can. This will make collection much easier. Take your spoon and scoop the hash from the Wash Bag. Place each spoonful of hash onto the 25µ drying sheet.
The towel below will soak up the moisture over time, leaving behind your hash! Using a freeze dryer is the best way to dry your hash out. These freeze dryers can be pricey so if you do not have one, the fridge can do the trick. The drying process can take between 12 and 48 hours.
Repeat this process for every Wash Bag you use. Many choose to keep the hash from each bag separated on the drying sheet. As we mentioned above, different microns produce different quality hash.
Additional Washes (optional)
It is not uncommon for hash-makers to run multiple washes. You can either collect the hash between washes or do multiple washes and just collect at the very end. If you choose to just collect at the end, wash the flower in a bucket with a 220µ bag and fresh water each time. Then, pull the 220µ bag and add the hash water mixture to the bucket with the remaining Wash Bags.
Cleaning your Wash Bags
Wash Bags can be used many times. They are good as long as the nylon mesh screen is still intact. To wash your Wash Bags after each use, first run cold water through the bag to remove any remaining plant material. DO NOT use warm or hot water as this can clog the nylon mesh. Next, use Isopropyl alcohol to gently soak the mesh. Lay them out and allow your Wash Bags to air dry. Now they are ready for another wash!
To Rosin or Not to Rosin
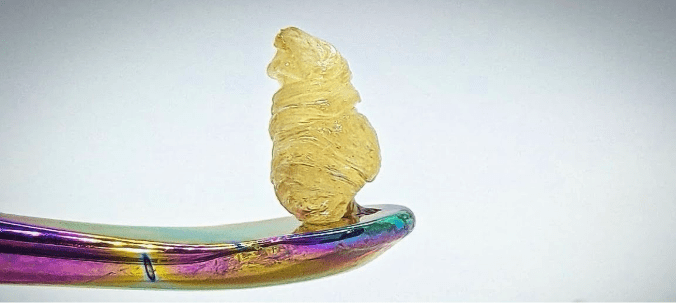
Once your hash has dried, you can either enjoy it (dab it) as is, or process it into hash rosin. The very best hash (6 star) really has no need to be pressed into hash rosin because it is already at a peak purity level…unless you really feel like it, then go ahead and press that hash! Lower quality hash (1-2 star) would not produce a very high-quality product even if it is pressed into rosin. This quality hash may be better used for edibles. Great quality hash (3-5 star) will produce great quality hash rosin. As many in the community say: Fire in, Fire out.
Special Thank You to our Friend Mike from Holi Extracts in Oklahoma who helped us with this How to Wash Bubble Hash article! Check out their Instagram here.