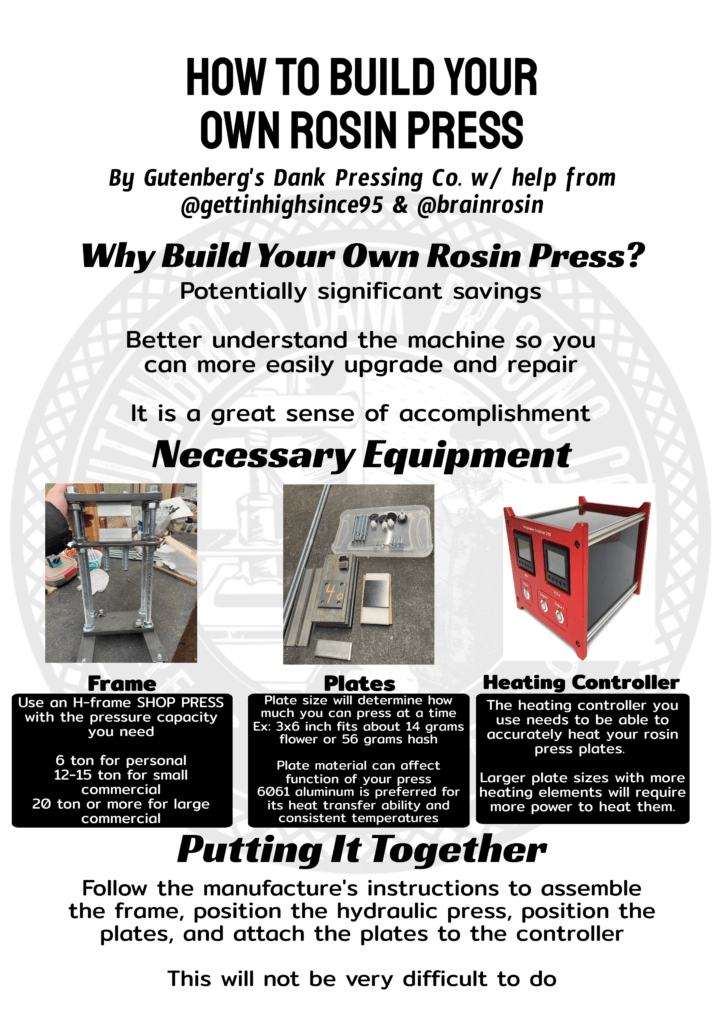
Easy to Follow Guide on How to Build Your Own Rosin Press
Table of Contents
DIY Rosin Press
Building your very own rosin press (DIY Rosin Press) may be easier than you ever thought possible. You do not need any expertise or prior experience to build a press that can work great for your specific needs. Anyone can do it! It does not have to cost you more than several hundred dollars either.
Many rosin pressers are choosing to build their own rosin press rather than buying one from name brand manufacturers for this exact reason. In this article we will cover why you should build your own rosin press, what equipment you will need to build it, how to put it all together, and how to use your DIY rosin press. We are lucky enough to have some expert input from Clay (@gettinhighsince95) who has been building rosin presses and helping others do the same for over a decade. Heating controller manufacturer, @Brainrosin, is also here to help.
DIY Rosin Press: Why Build Your Own Rosin Press?
When there are so many great rosin presses available for purchase that do not require anything other than plugging it in, why take the time and energy to build your own press? Well, there are a few reasons. First of all, when building your own press, you can make a quality machine for potentially significant savings when compared to purchasing a ready-made rosin press. You can make a quality rosin press for under $500. We will get into the necessary parts to build your own DIY rosin press in the next section.
Another reason to build your own press is because you now have the ability and knowledge to upgrade and maintain your machine. New plates? No problem. You can easily switch them out. Clay is an expert at hand-built rosin presses. He works 1-on-1 with the customer to design and manufacture rosin presses that fit the customers specific budget and functional needs. He says the sense of accomplishment from building then using your very own rosin press is very empowering.
So, the benefits of building your own rosin press include potential cost savings, having the freedom to upgrade your machine parts, having the expertise to maintain your machine so it can last a lifetime, and a great sense of accomplishment from building a machine which is solely yours. Now, let’s look at how to actually build your own press!
How to Build a Rosin Press
Necessary Equipment
Unless you are building your own DIY rosin press from scratch (which we will briefly cover later in the article), there are only 3 main pieces of equipment you will need to build your own rosin press. These are: the frame (with optional hydraulic press), the press plates, and the heating controller.
Frame
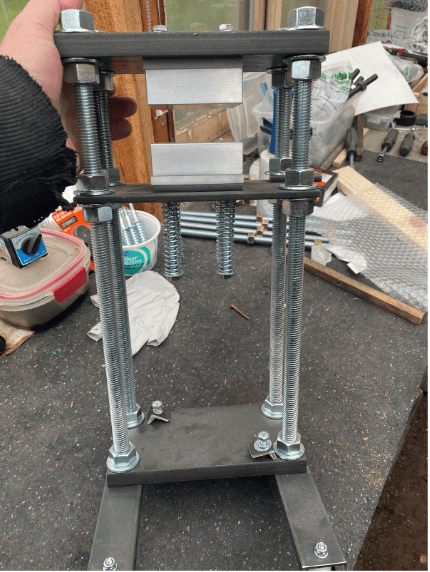
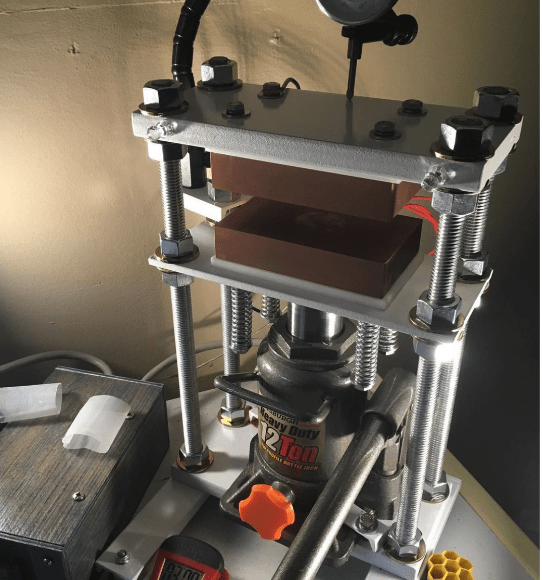
The frame you use needs to be strong enough to handle the high pressure involved when pressing rosin. It also needs to be able to be fitted with your press plates. The most popular website to acquire a shop press is Harbor Freight. Most commonly these presses come in the “H-frame” style, but you can also find “A-frames”.
An important question to ask yourself is, how much pressure do you need? You can find shop presses that produce 6 tons, 12 tons, 15 tons, 20 tons or more. If you are pressing for personal use, you can usually get away with the 6 ton press. Small time commercial use might benefit from 12 or 15 ton presses. Larger commercial operations would better use the 20 ton press than a smaller size. For those of you with higher pressure needs, you might consider purchasing a larger industrial-grade hydraulic press.
DIY Rosin press expert, Clay, personally builds each frame for the customers’ specific needs. He considers how much material you want to press at a time, what your budget is, and what your goals are when using your rosin press. These are all important to consider when building your own rosin press.
Plates
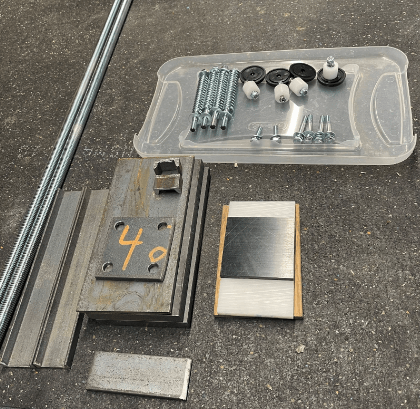
The press plates you use will determine a lot about the function of your press. How large are the plates? What are they made of? These are both important questions to consider.
There are also a good bit of plate manufacturers that you can choose from. Rosin press building expert, Clay, builds his plates by hand to fit your exact pressing needs. He also works with heating controller experiment, @Brainrosin, who makes the heating controllers. You can also purchase plates and the heating controller from several other manufacturers. Dulytek is one of the more popular options people use. They offer several plate sizes to choose from including 3×4 inch, 3×6 inch, and 3×8 inch.
Plate Size
The size of your rosin plates for your DIY rosin press will determine how much material you can press at once. For example, 3×6 inch plates can work with 3×6 inch bags (or smaller). This size bag can fit about 14 grams of flower or 56 grams of hash.
Clay suggests using 3×3 inch or 3×5 inch plates for personal use. For commercial use, he has found the 4×8 inch plates have become quite popular.
Plate Material
There are generally two options for plate material: aluminum and steel. Aluminum is much preferred as it has “great heat transfer ability and gives you consistent temperature across the plate”. Specifically, 6061 aluminum is the best for rosin press plates. Steel plates are more durable than aluminum plates so some may choose to go that route. Anodized aluminum plates have increased durability which makes them a popular choice.
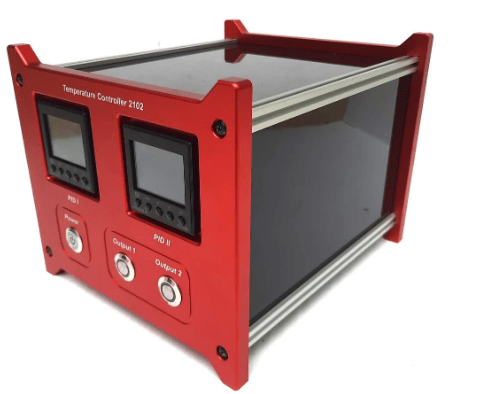
The heating controller uses power from a wall outlet to heat your rosin plates via wired connection. Manufacturers like Dulytek have combo kits that include both the rosin plates and the heating controller. We spoke with a heating controller manufacturer, @BrainRosin on instagram (here is his website), about his hand built heating controllers.
He partners with Clay who makes the rosin press plates and frame to provide customers with high quality build-your-self rosin presses. Each of the heating controller variations are hand made with care and come with guaranteed function for a year. Replacement parts and fixing issues are also easily accomplished with their 1-on-1 support through Instagram, Reddit, or email ([email protected]). The heating controllers are made to last with anodized aluminum for the box that houses the electrical components.
There are even more options for heating controller units available and many of them vary a bit in price. Remember, heat control and accuracy are two of the most important aspects of pressing rosin. So, get a controller that can accomplish these things and you will be making high quality rosin! Larger rosin press plate sizes may have more heating elements so this will require more power from the heating controller than smaller plates would.
Pressure Gauge (optional)
Using a pressure gauge can help you to really dial in your pressing technique beyond doing it “by feel”. The gauge will measure your PSI (pounds per square inch). Keeping track of the PSI used for a particular quantity of starting material can help you create reproducible results time and time again.
Putting It Together
Once you have the frame, hydraulics, plates, and heating controller, putting it together is not too hard at all! Simply follow the manufacturer’s instructions to assemble the frame and plates, and to place the hydraulics in the proper location. This usually involves turning a few bolts and placing some washers over some large screws then sliding the plates and other necessary parts into place. Info about attaching controller
Check out this video Clay made that covers how to assemble your rosin press frame and plates.
Manufacturing Your Own Parts
If you would like to manufacture your own parts rather than buy pre-made parts then assemble them, you are going to need several shop tools and a bit of expertise. We suggest leaving the fabrication of parts to the experts, but if you really know what you are doing, it can be done.
The major shop tools required include a drill press, a hand drill, drill bits, and cutting tools. If you would like more specific information on building the frame, rosin plates, or heating controller yourself, message us and we can connect you with some of the experts in the field.
How to Use Your Rosin Press
with a DIY rosin press made by Clay (@gettinhighsince95)
Once your DIY rosin press is fully assembled, it is time to press some rosin! The process of pressing flower rosin and pressing hash rosin are pretty similar. A combination of heat and pressure applied to your starting material creates rosin. Rosin bags that are made of a fine nylon mesh, hold in unwanted plant material, and let the rosin flow through the mesh.
The finer the mesh, the less material gets through, but what does get through is very clean. To determine what rosin bag is best for you, consider the size of your rosin press plates and what your starting material is. Flower rosin is usually made using 37 micron – 220 micron bags. Hash rosin is made using 15 micron – 37 micron rosin bags.
To pack your rosin bag with flower, break the buds into medium sizes and remove all stems. For hash, it is helpful to sift the hash into a fine material. Pack your rosin bag tightly, being careful to avoid any air pockets. Air pockets can cause a blowout (when your bag ruptures and contaminates the rosin).
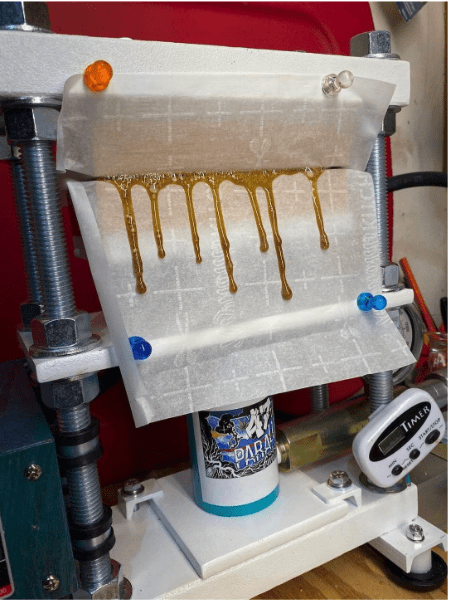
After packing your rosin bag, line the press plates with parchment paper you will use to collect the rosin when it is squished from the rosin bag. Place the rosin bag in the middle of the plate laying flat (you may also choose to place it vertically when pressing Bottle Tech or Chottle Tech Style).
Apply just enough pressure with the plates to hold the rosin bag in place. Now, turn on the heat and let the rosin bags sit there for about 30 seconds to warm up. Flower rosin is usually pressed at about 175F to 210F and hash rosin at about 175F to 190F. These 30 seconds prepare the starting material to be squished. Begin to apply the pressure in a steadily increasing fashion.
You do not want your bags to just sit on the heat without increasing pressure. The press can last anywhere from a minute to several minutes depending on how much material you are pressing and at what temperature. More material or lower temperatures usually means more pressure is required for max yield.
Once finished with the press, collect your rosin using a dab tool and store it in an airtight container. You may choose to cure your rosin. Curing involves using light, heat, pressure, and air to change the terpene and cannabinoid profiles.