How to Press Rosin Using Bottle Tech Style
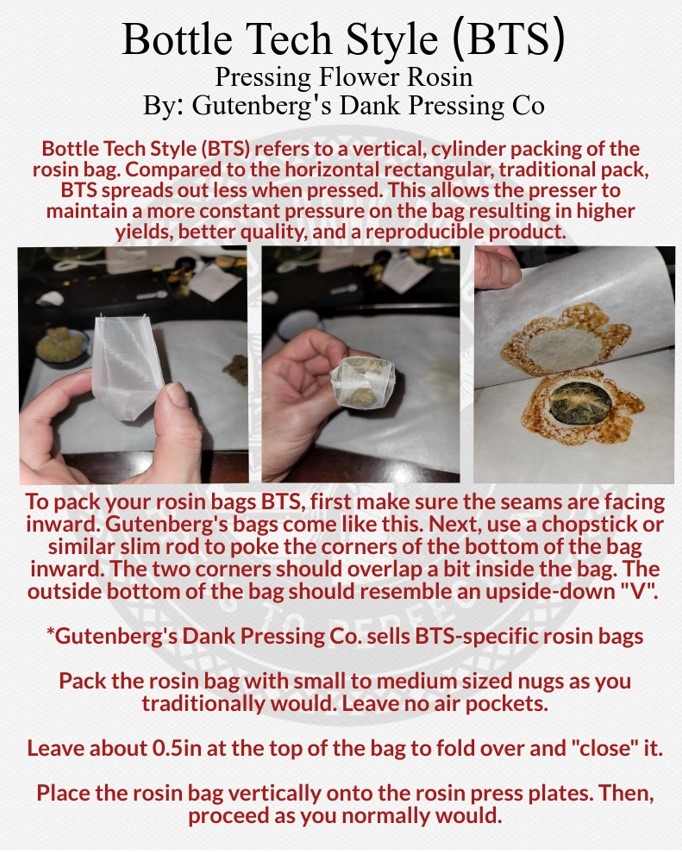
Bottle Tech Style (BTS) refers to a particular way of packing your rosin bag with flower. This technique is generally not used with kief, dry sift, or hash. To BTS, the rosin bags are packed and placed onto the rosin press vertically, rather than horizontally like a traditional press. This allows the presser to more accurately control and apply pressure. This can consistently increase yields with reproducible results so you have the perfect press every time.
In this article we will cover what you need to press BTS, how to press BTS, and what makes BTS the best method to press flower rosin. It is important to remember that perfecting the art of rosin pressing takes time and practice. Not only that, but each strain and even each bud presses slightly differently. You never stop learning when pressing rosin and that is part of the experience.
What You’ll Need to Learn How to Press Bottle Tech Style
- Rosin bags (preferably BTS-specific bags)
- Marijuana/hemp flower
- Humidity packs or terracotta humidity stones
- Parchment paper
- Dab tool
- Glass or silicone container
- Timer
- Rosin Press
To press BTS, you need a few materials including: rosin bags, marijuana/hemp flower, a rosin press, parchment paper, a dab tool, a glass/silicone container, humidity packs, and a timer. We suggest using a rosin bag specifically designed for pressing BTS. BTS rosin bags are stitched on the sides rather than the traditional stitching on one side and the bottom. This allows the rosin to flow more evenly when pressing BTS.
The starting material you use should be properly humidified to around 60-70% relative humidity. Too dry and the terpenes of the flower may burn during the press and it may not yield as much. Too wet and the rosin will be runny, yield will be affected, and the flower runs a chance of growing mold. You can add humidity to your flower by using humidity packs or terracotta humidity stones. Humidity can be measured using hydrometers.
Parchment paper is used to collect the rosin on a non-stick surface. A dab tool is used to collect the rosin, post press, into your glass or silicone container. The rosin press is used to…. press the rosin. And the timer is useful while pressing.
Table of Contents
How to Press Bottle Tech Style
1. Choose a Rosin Bag
The rosin bag you choose has to do with how much flower you are pressing and personal preference. For example, 2×4 inch bags generally fit up to about 7 grams of flower. Next you have to pick which micron (µ) bag to use. This can be anywhere from 25µ to 220µ. The finer the mesh of the rosin bag (lower microns), the harder it is for material to get through. While that may sacrifice yield, the end product will be cleaner. It will take some experimenting to find what you think makes the best end product. The most popular micron sizes are 90µ and 120µ.
You may also want to consider using BTS-specific bags as opposed to traditional rosin bags. BTS bags are stitched on both sides rather than the traditional method of one side and the bottom. This allows the rosin to more evenly flower from the center while pressing BTS.
2. Humidify Your Flower
Ideally, your flower should be between 60% and 70% relative humidity (RH) when pressing rosin. This is the sweet spot that allows you to retain the flavor of the terpenes while getting high yields. To humidify your flower, place it in a container (anything the seals will do) with either a humidity pack or terracotta humidity stone.
Use a hydrometer to measure the relative humidity. We suggest letting the flower sit at about 60-70% RH for 3-4 hours. Keep an eye out that it does not go above or below the 60-70% range.
3. Prepare the Rosin Bag – BTS
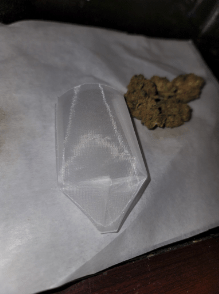
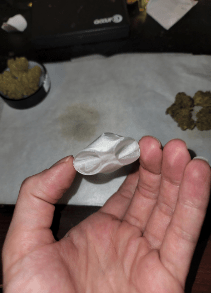
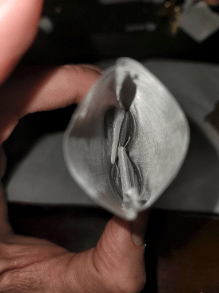
Left: Rosin bag with corners poked in
Center: Bottom view of the rosin bag with corners poked in
Right: Top view of the inside of the rosin bag with the corners poked in
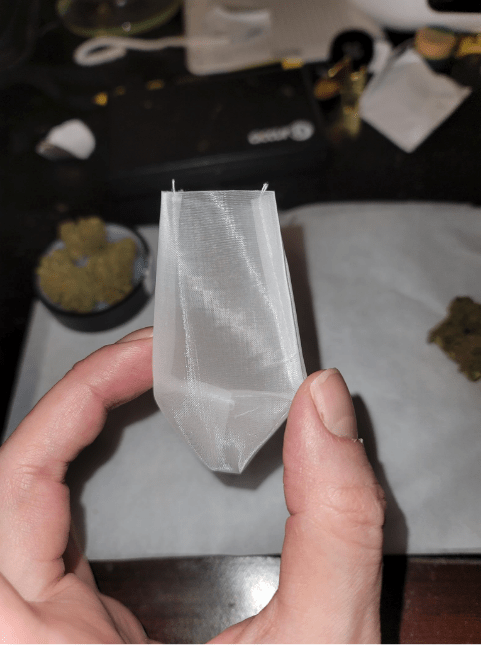
To begin, make sure the rosin bag is flipped inside-out so that the seams are on the inside. This can help increase bag strength and avoid any rosin getting stuck in the seams when being squished out. Gutenberg’s Dank Pressing Co. rosin bags come pre-flipped so if you have our bags, you can skip that step.
Next, using a pen, chopstick, or any similar slim cylindrical object, to poke the bottom corners of the rosin bag inward. This will form the bottom of your bag into a “V” shape. The tips of the corners should overlap a bit inside the bag. All of this helps to keep the bottom of the bag in a circle when pressed.
4. Pack The Rosin Bag
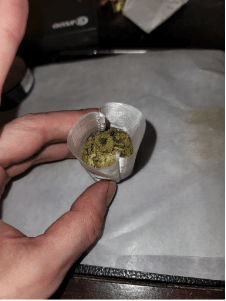
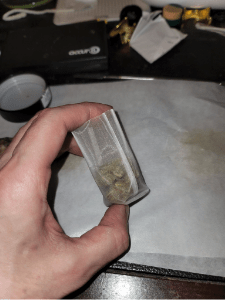
Top left: packing the rosin bag, base first
Top Center: Packed rosin bag
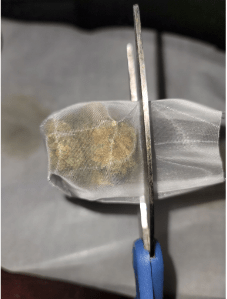
Top Right: Trimming excess bag, leaving 0.5in
Bottom Left: Closing the top of the bag
Bottom Right: View of the bottom of the bag and the triangle corners
This is one of the most important steps. The packing job can make or break your end product. Unwanted air pockets can lead to blowouts and lower than expected yields. Stems are a big no-no. You want to pack the rosin bag with small to medium sized nugs, nothing ground up. Start with a solid base at the bottom of the bag.
It is like a game of tetris; leave no open spaces at all. If the nug is too big, break it up a bit. When done correctly, you will see the corners of the bag folded over each other on the bottom of the bag. Leave at least half an inch at the top of the bag to fold over. If there is more than 0.5in left after filling, go ahead and trim the rest. Fold the remaining 0.5in inward to “close” the bag.
5. Prepare the Rosin Press (Setting a Temperature)
First, line the rosin press plates with parchment paper. It is much easier to collect rosin from the parchment paper than the plates and this helps to keep everything clean. It may be helpful to use magnets to secure the parchment paper to the plates.
Next, set a temperature between 160℉ and 220℉. Lower temperatures may retain more flavor in the end product than if pressed at higher temperatures. Yield may be sacrificed in the process. Higher temperature presses, while it should have higher yields, may result in a more runny end product that is harder to handle. It will take some experimenting to find the sweet spot between flavor retention and yield. We have found most people press between 185℉ and 195℉, but to each their own!
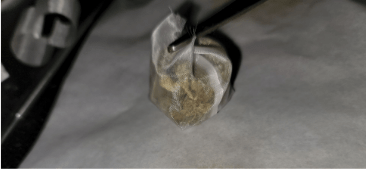
6. Place the Rosin Bag onto the Rosin Press
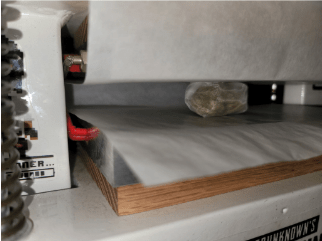
Place the rosin bag in between the rosin plates, towards the center. You want to leave enough room so that if the bag spreads out a bit during the press, it does not overlap the plates. If you are pressing multiple bags at once, give them enough room to spread out without overlapping the plates or each other.
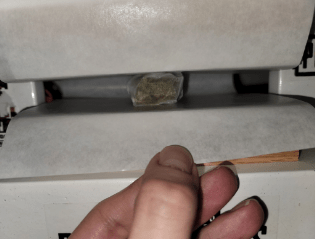
7. Apply Pressure
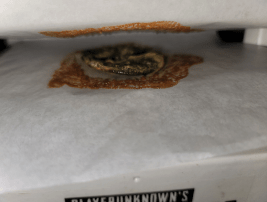
Photos by Mamulator
How you apply pressure is maybe the most important aspect of a rosin press. First, you want minimal pressure, just enough to hold the bag in place. Let the rosin bag sit on the heated plates like this for about 30 seconds, to let the flower warm up. Next, steadily increasing pressure the whole time is a key success. Go so slow your arm hurts. If you let the press sit for too long without increasing pressure, the spaces in the rosin bag mesh could clog up, affecting quality and yield. The total press should last about 2 – 4 minutes.
You want to apply as much pressure as you can over the course of the press, without causing a blowout. Blowouts can occur for a few reasons, one of which is too much pressure. If you are using a pressure gauge, a 7 gram press can usually top out around 3 tons. If you are pressing more than 7 grams, adjust the maximum pressure accordingly (i.e. a 14 gram press may max out around 6 tons before a blowout). Many choose not to use pressure gauges and go by feel. In either case, it will take some experimenting to get the touch just right.
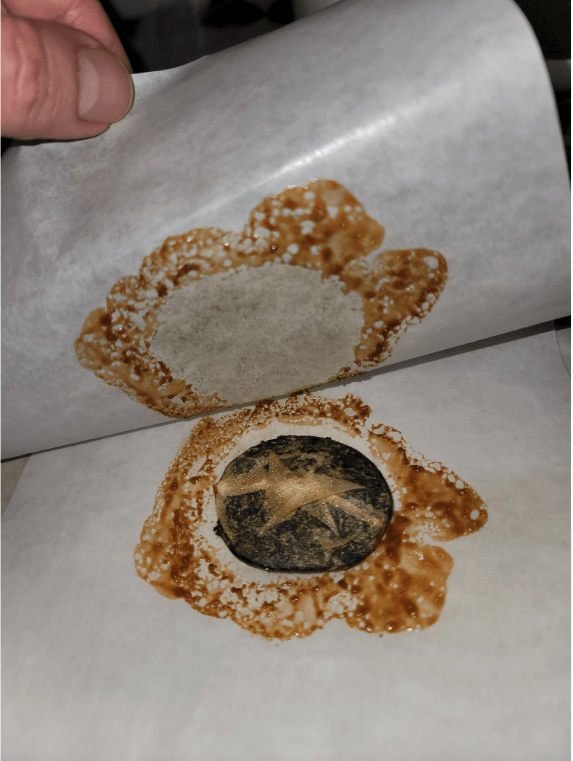
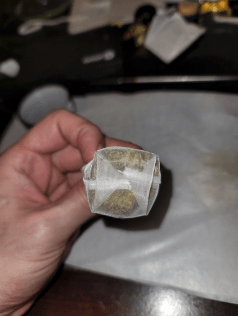
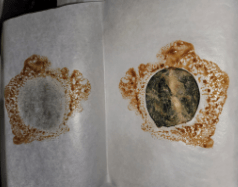
Once you have reached maximum pressure, check to see that the rosin has stopped flowing out of the bag. If so, the press should be complete. Immediately remove the rosin and parchment paper from the heated plates.
Pro tip: when learning to press, start with smaller presses (3.5 grams is a good place to start) so you can avoid high product costs. As you get more skillful, work your way into larger presses.
8. Collect the Rosin
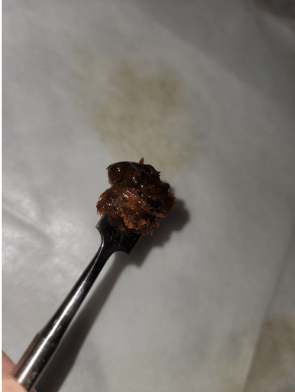
To collect your freshly pressed rosin, it is advantageous to cool down the rosin and make it a bit easier to work with. This can be accomplished with a cold plate or just letting it sit at room temperature for a few minutes. More sappy rosin may need some time in the fridge to stabilize.
Once stable, use your dab tool to collect the rosin from the parchment paper. A rolling motion with the head of the dab tool is the most efficient way to collect. If the rosin has a shatter-like consistency, it may be easier to collect using a non-stick glove. Pat your gloved-hand onto the rosin to lift it from the parchment.
It is best to keep rosin in a sealable jar. Glass or silicone work best.
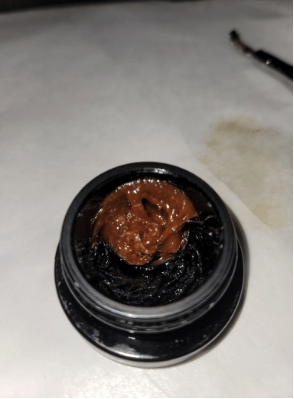
9. Cure Your Rosin
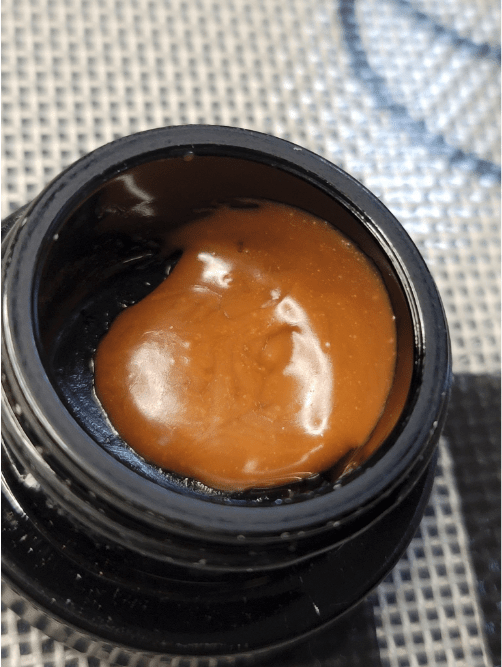
Curing rosin is the act of adding light, time, pressure, temperature differences, and agitation to change the consistency and flavor. Rosin can be cold-cured, heat-cured, or cured at room temperature. Generally, the colder the temperature, the longer the cure will take.
With your rosin in a sealed jar, all you need to do is give it time in either a cold or heated environment. The cure can last where from a few hours on a heat plate to two weeks at 50℉. During the cure, you may see puddles of terpenes begin to form and separate from the rest of the rosin. Many desire this effect. At any point, whipping the rosin with your dab tool helps to homogenize the mixture and create a badder-like consistency. How you cure is entirely a personal choice and will take some experimenting to perfect.
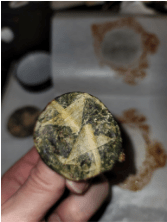
10. Save Your Rosin Chips
You can use the pressed rosin bags (rosin chips) to create some pretty potent edibles down the line. We suggest using about 4x as many rosin chips as you would flower to make edibles. For example, if you usually use 7 grams of flower to make cannabutter, use 28 grams of rosin chips. Here is a guide to creating rosin chip edibles: rosin chip edibles
How to Press Bottle Tech Style: Is Bottle Tech Style the Best Method of Pressing Flower Rosin?
Using Bottle Tech Style (BTS) to press flower rosin is thought by many to be the most efficient method. By placing the bag vertically on the press, rather than the horizontal orientation of a traditional press, the presser is better able to control pressure. More control means better quality and reproducible results.
When pressed, the bag will spread out, increasing the surface area of the bag touching the plate. Using BTS, the bag spreads out less than traditionally, meaning less changes in the pressure on the bag (more control). After pressing, you should see the rosin bag squished into a tight circle. In the end, it is up to you whether you think BTS is the best method to press flower rosin. Who knows, maybe you’ll get those big yields you’ve always wanted.